Wednesday, 10 August 2011
Trip to Scotland
We were booked for longer but only managed two days because of the rain. I'm not an avid camper at the best of times. I'm getting too old for that lark but I did manage to get some photos of the lovely countryside, parks and gardens at Kailzie Gardens and Rosetta camping site near Peebles. I've put them onto a slideshow at photobucket for sharing, click here to view.
Hope you like
Monday, 1 August 2011
Lace Christmas Box
I'm usually rushing at the last minute to create something for the Bah Humbug challenge but this time I'm rushing early because I need to go stay with my daughter who is poorly. I had to get it finished tonight as I so wanted to 'think outside the box' literally (smile).
The challenge this week is to create something with lace and I chose to decorate a star shaped box. I first painted the box with two coats of emulsion in pistachio. I then threaded a double strand of thin brown organza ribbon through a length of vintage lace and made a gathered skirt for the box I then adhered the top edge of the skirt around the top edge of the box with glue. It was easier than I expected considering I had to attach the skirt in and out of the five pointed star and I secured the ribbon in a bow.
I decorated the lid with a gold pine cone, leaves and dropped pearls and then added some gold glitter to each point of the star.
I enjoyed making my Christmas box with lace. Thank you Humbug Hall for the challenge.
The challenge this week is to create something with lace and I chose to decorate a star shaped box. I first painted the box with two coats of emulsion in pistachio. I then threaded a double strand of thin brown organza ribbon through a length of vintage lace and made a gathered skirt for the box I then adhered the top edge of the skirt around the top edge of the box with glue. It was easier than I expected considering I had to attach the skirt in and out of the five pointed star and I secured the ribbon in a bow.
I decorated the lid with a gold pine cone, leaves and dropped pearls and then added some gold glitter to each point of the star.
I enjoyed making my Christmas box with lace. Thank you Humbug Hall for the challenge.
Saturday, 30 July 2011
late night ramblings
We have visitors this weekend so I am cleaning up as if royalty was coming! I'm behind schedule because I've felt so yuk today but I'm not going to get too worried about that (she says). My crafty things will be out of bounds as my craft room will be my guests' bedroom. Thats OK as long as I don't get withdrawal, lol.
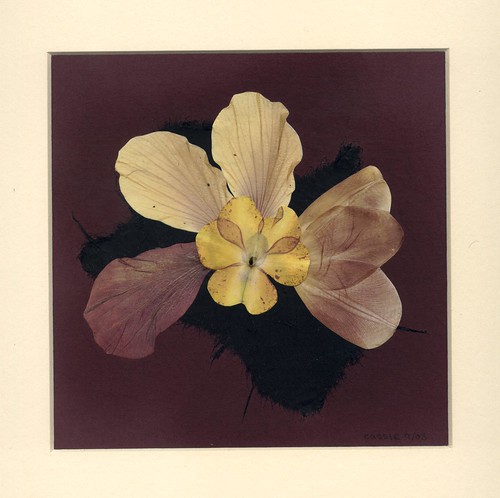
To keep the old mojo inspired I sometimes look back at some of my pressed flower artwork and amaze myself.

tropicana10001, a photo by florafinity on Flickr.
Did I do that???? How did I do that???? Must try that again!!!
Like this fantasy flower pic created back in 2002. I love them as much now as I did then, they are like old friends, made at the start of my journey into pressed flower art. I share one with you here.
Wednesday, 27 July 2011
Bah Humbug Beads
This weeks challenge at Bah Humbug Christmas item challenge is to use beads. I went for a black and white look using black card stock and a snowflake background paper. I think I made the background design myself but its been hanging around in my puter for so long I could be wrong.
The vintage image is from an old postcard I picked up at the market. Doesn't she look warm and cosy in that big hat! The hat has some kind of tassel on it so I decided to make it more prominent with silver beads. I finished the card off with a silver ribbon and an insert printed off with the same snowflake design but in draft.
Here is a detail
Please leave a comment. I love to hear from you.
Thursday, 21 July 2011
Note Cards
In this age of email and mobile texting, I think one of the nicest things is to receive a handwritten letter from some one. When its in the form of a pretty card its even better!
I have some Kraft cards and envelopes I had intended making into rustic greetings cards using pressed flowers, printed paper scraps and some distressing but that idea has been shelved for the moment. I spent some time playing with them today and decided they would make nice note cards. The C6 size is just right and the rustic colour is different. I thought a black border would work printed directly onto the note card and found just what I needed in my pressed botanical artwork. I gave them a digi twist sketch effect and got rid of the colour and made a digi stamp of the image.
My first attempt looked a bit intense so I lightened it and printed out a faded image. The latter just cried out for colour and so I highlighted by hand with Sakura and Marve le Plume pens. So now I had two cards, one with a dark print and one lighter and coloured. I found an image to use as a topper and mounted it onto the cards and added bronze coloured peel off lines around the toppers.
The problem is I can't choose which one I like the best! I want to make a batch of them but can't decide which to use. I hope someone will decide for me.
Kraft cards and envelopes from Joanna Sheen
Topper image from Crafty Computer Paper
Saturday, 16 July 2011
flickr
Ooooo, this is useful!
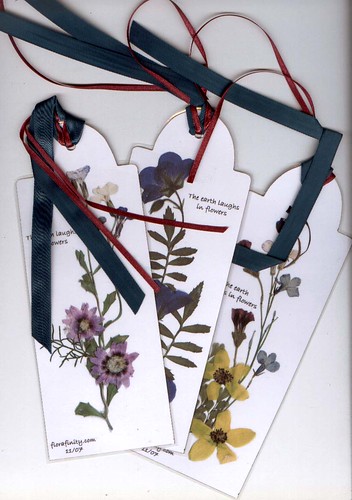
I am browsing through my flickr account and discovered I can share direct to my blog. I love the bookmarks I created in 2007. I gave several to friends I meet up with on holiday and I'm touched to know they still use them. Simple gifts yet worth so much in friendship.
Via Flickr:
pressed flower arrangements printed
I am browsing through my flickr account and discovered I can share direct to my blog. I love the bookmarks I created in 2007. I gave several to friends I meet up with on holiday and I'm touched to know they still use them. Simple gifts yet worth so much in friendship.
Via Flickr:
pressed flower arrangements printed
Wednesday, 6 July 2011
Acetate challenge
I had wanted to make some little boxes for this challenge but as is too often these days, I ran out of time.I was lucky enough to find some acetate jackets in my stash already folded and printed with white wavy frames. I vaguely remember buying them eons ago ! They are perfect for this project and so I added some glittery gold peel off frames directly onto the acetate and mounted some christmas peel offs onto paper, coloured and cut them out for mounting onto the acetate with tiny sticky foam pads.
I love the intense blue of the foiled card I used (for 3yr olds and upwards). Why should kids have all the fun, LOL, and I stuck a white Christmas greeting in the centre then finished it off with thin white organza ribbon.
Hope you like.
Subscribe to:
Posts (Atom)